Overblog
Suivre ce blog Administration + Créer mon blog

Recherche

Archives

Articles RÉCents

25 août 2012 6 25 /08 /août /2012 00:43

kale


This is for the 'health' nut :-)  It's refreshing and amazingly tasty.

No cooking involved, all you need is a blender !


Ingredients:

- 2 parts fruit ( we had some frozen organic peach, mango pineapple from Costco and some cut up frozen

bananas so in they went :-))  Banana is a key ingredient.

- 1 part beet and kale

-  some organic almond milk


Preparation:

- Peel and cube the beets into 1/2 inch cubes

- Wash and cut kale leaves into small pieces (or buy them precut, but make sure you remove all

the hard stems)


1. Add the kale to the blender, top with almond milk and blend well.

2. Add the beets, adjust the amount of almond milk,  blend then add the fruit -I like to keep the almond milk almost leveled with the fruit- and blend well.

II used the 'food chop then 'high' setting, stopping once in a while to 'help' the blender with a  fork to move the pieces 

of fruit down'.  You can add more almond milk if it feels too dense.  

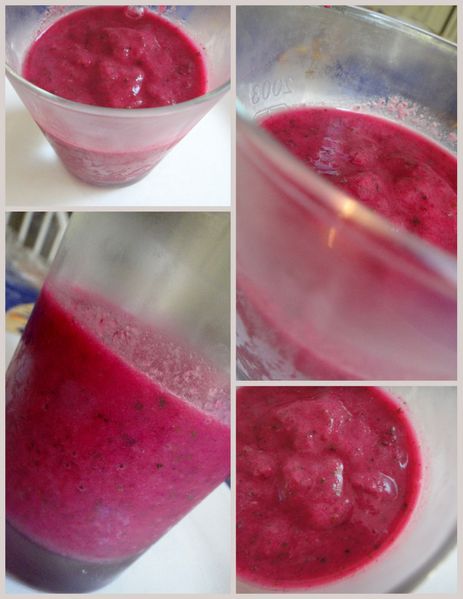
Once everything is chopped I hit 'high speed' on the blender a couple of times to mix it well, and serve the

smoothie ice cold.  


The super health nut can add a bit of whey protein t the smoothie (at the beginning), and the sweet tooth babes can add a bit

of honey or algave to taste (at the end, before serving)


A yummy snack for a hot summer afternoon !  Enjoy and have a happier summer :-)


Partager cet article
Repost0
25 décembre 2011 7 25 /12 /décembre /2011 22:21


Brined and everything ...   

First lesson learned: check to make sure that the turkey is 'fresh' and not injected with saline solution before

brining

Second lesson learned: defrost the turkey at least a day before brining and if bought fresh there is no need

to put it in the freezer ... duh! Live and learn :-)


2012-0626.JPG

Brine courtesy of all recipes dot com:

INGREDIENTS:

- 1 quart vegetable broth 

- 1 quart apple juice

- 1 Cup sea salt

- 1 T crushed dried rosemary

- 1 T dried sage

- 1  T dried thyme

- 1 T dried savory (optional: I didn't have any :--)

plus

- 1 gallon ice water

Also need a Turkey Brine Ziplock bag.


Preparation:

1. In a large stock pot, combine the brine ingredients (except for the ice water). Bring to

a boil, stirring frequently to be sure the salt is dissovedl Remove from heat and let cool

to room temperature.

2. In the mean time, wash and dry your turkey. Make sure you have removed the innards.

3. When the broth mixture is cool, mix in the ice water. 

4. Place the turkey into the brine bag. Pour the brine over the trukey making sure it's

fully immersed. Zip the bag closed and place in an ice chest, cover with ice and leave

overnight (12hours)

5. Remove the turkey from the brine, carefully draining off the excess brine and pat dry.

Discard excess brine.

6. Cook the turkey as desired. Keep in mind that briend turkeys cook 20 to 30 min faster

so waht the temperature gauge.


Partager cet article
Repost0
30 mars 2011 3 30 /03 /mars /2011 22:46

DSC00270.JPG


This has become my signature salad because ... I make it just about once a week. :-)


Ingredients:

-   6 cups Spinach ( I like the leaves to be a bit thicker so no baby spinach please)

-  1  fuji apple (preferably organic, if not peel the thick/glossy skin please)

-  1/2 cup cheese grated ( I like Trader Joe's Toscano with black pepper, but you can use parmesan or any hard cheese

you like)

-  1/2 cup pecan

-  1/2 lemon (to keep the apple from turning brown


Vinaigrette:

 * Mix well equal part of sugar and vinegar + double part olive oil

- 2 TBSP  olive oil (w/ garlic)

- 1 TBSP sugar

- 1 TBSP japanese seasoned vinegar (if you can't find, use apple cider vinegar and add a pinch of salt)


Preparation:

Remove stems from spinach leaves, wash and dry well

-  Cut the fuji apple into quarters, remove core and slice.  Then sprinkle with lemon so they don't turn yellow.

-  Break up the pecan if they come in halves

-  Grate the cheese

-  Before serving mix the vinaigrette well, than slather it on the spinach leaves until just covered, add pecan,

apple, cheese et voila`


Easy peasy cheesy yummy salad that will make you as strong as Popeye !! :-)


2010-08-151.JPG

Partager cet article
Repost0
8 avril 2010 4 08 /04 /avril /2010 20:29


I finally tried my hand at making 'Orangette' for a touch of Paris in the spring,since my best friends went to Paree without me :-) plus we still have tons of oranges on the tree and I hate to see the peels go to to waste, so here goes...


I am pleased to report the result in these pics and as far as taste ... they are ... yummy, chewy /tangy /sweet on the inside, bitter croquant on the outside ... what else can one asks for? :-)


INGREDIENTS:
 
- Equal part orange peels, water, and sugar:
  - Peel from 5-6 medium-size oranges (175gr or 1 overflowing cup)
  - 3/4 cups of water ( 1 cup= 236gr)
  - 3/4 cup sugar
- Valhrona Le Noir Amer (71% Cacao) Chocolate: 2 tablets each - 3.5 oz - 100grams
PREPARATION:

1. Slice ends off four oranges, score the peel from one end to the other, and remove the peels from the oranges. Cut
off some of the pith i.e. leave some.
2. Slice the peels into thin strips and trim the edges. (about 3 mm in width, they will shrink)
3. Using a medium size pot, place the peels in boiling water and blanch them for a 5-7 minutes. Rinse the peels with cold water, and repeat this process a second time. Taste check a bit of peel, if it still tastes bitter, repeat a 3rd time.
4. Prepare the simple syrup by combining water and sugar in a saucepan. Bring the syrup to a simmer, place the peels in the pot, and simmer for 1 hour. Put a timer on, keep an eye on the pot in the last 15' as you don't want to burn the syrup and the peels.
5. Once the peels have cooked, remove them from the pot, and place on a rack to cool and dry overnight.
6. Next day: Melt  over a double boiler. Dip the candied orange peels in the chocolate, remove them quickly, and let them cool on a piece of parchment or foil paper. Place in fridge to harden.
7.Store the orange peels in an airtight container... that is if there are any left :o)


Partager cet article
Repost0
5 décembre 2009 6 05 /12 /décembre /2009 23:05
Another recipe adapted from Allrecipes.com's Orange, Walnut, Gorgonzola and Mixed Greens Salad with Fresh Citrus Vinaigrette.  I used Cuties instead of oranges. What's cuties? Well, they are these cute hybrid fruit that's a cross between a sweet orange and a Chinese mandarin, sometimes called clementines as well I think.  They added a light citrusy taste to the salad which is definitely in my cooking repertoire now :-)

Ingredients
2 Servings
  • 1/4 cup walnut halves
  • 5 ounces mixed salad greens with arugula
  • 3 medium size cuties (peeled and cut into individual wedges. Reserve the juice to add to the dressing)
  • 1/4 cup sliced red onion (marinated in 1 tablesppons of japanese seasoned vinegar)
  • 1/8 cup olive oil
  • 1/4 cup cuties juice (strained)
  • 1/8 cup white sugar
  • 1 tablespoons balsamic vinegar ( I used orange muscat champagne vinegar)
  • 1 teaspoons Dijon mustard
  • 1/8 teaspoon dried oregano
  • 1/8 teaspoon ground black pepper
  • 1 pinch of sea salt
  • 1/8 cup crumbled Gorgonzola cheese
Directions
  1. 1. Place the walnuts in a skillet over medium heat. Cook 5 minutes, stirring constantly, until lightly browned.( I skipped this part, the walnuts still tasted fab ... so it's optional :-))
  2. 2. In a large jar with a lid, mix the olive oil, cuties juice, sugar, vinegar, mustard, oregano, salt and pepper. Seal jar, and shake to mix.
  3. 3. Divide the salad greens,  cuties, and red onion into individual servings. To serve, sprinkle with walnuts, Gorgonzola cheese, and drizzle with the dressing mixture.


Partager cet article
Repost0
28 novembre 2009 6 28 /11 /novembre /2009 23:53
I love allrecipes.com, really.  I've tried a few of the recipes there and they all turned out as expected, i.e. really good - that is if you picked the recipes with the most and highest ratings :-)

This is 'adapted' to make it less sweet and enough for two.


Ingredients
  •  2 cups sweet potato, cubed
  • 1/4 cup white sugar (scant)
  • 1 egg, beaten
  • 1/4 teaspoon salt (scant)
  • 2 tablespoons butter, softened
  • 1/4 cup milk
  • 1/4 teaspoon vanilla extract
  • 1/4 cup brown sugar (scant)
  • 1/6 cup all-purpose flour
  • 1 1/2 tablespoons butter, softened
  • 1/3 cup chopped pecans
Directions
  1. Preheat oven to 325 degrees F
  2. Put sweet potatoes in a medium saucepan with water to cover. Cook over medium high heat until tender; drain and mash.
  3. In a large bowl, mix together the sweet potatoes, sugar, eggs, salt, butter, milk and vanilla. Mix until smooth. Transfer to a buttered baking dish.
  4. In medium bowl, mix the brown sugar and flour. Cut in the butter until the mixture is coarse. Stir in the pecans. Sprinkle a bit of salt on top. Sprinkle the mixture over the sweet potato mixture.
  5. Bake in the preheated oven for 30 minutes, or until the topping is lightly brown.
  6. Serve hot/warm.  ( I can't stop eating it .... :-) )

Partager cet article
Repost0
8 septembre 2009 2 08 /09 /septembre /2009 01:34
Why late summer rolls and not spring rolls? ... because I started making them in late summer for our after- golf -practice-lunch-in-the-garden with chi KA and Lisa :-)  The first time we made them with the traditional vietnamese rice noodle (bun') and this time with green tea soba noodle ... and they were ... spectacular if I may say so  :-)


INGREDIENTS:
Makes about 18 summer rolls
- Albacore Tuna (1 big fillet :0))
- 3/4 fuji apple
- 1 avocado
- 2 small cucumbers (persian)
- 2 small heads of lettuce
- 1 bundle of green tea soba noodle
-  Rice paper wrap

PREPARATION:
1. Sear the tuna and cut into strips
2. Clean and cut the stem off the lettuce
3. Cut the cucumber, fuji apple and avocado into chopstick size julienne
4. Boil the soba noodle al dente
5. Place everything on the wet paper rice (you know what I mean ... I hope :-))
6. Keep on rolling ...
7. Cover the rolls with a wet paper towel to keep them from drying out until ready to serve
8. To serve, cut the rolls in half and serve with some soy sauce (I like the one with ponzu - japanese lime and bonito flakes) and shiracha hot sauce .. YUM!


Partager cet article
Repost0
3 avril 2009 5 03 /04 /avril /2009 21:39

This is the first time I make a white chocolate whipping cream, and boy I don't think I'll go back to plain whipping cream ... :-)  And I have to confess that I like white chocolate a bit more every day ;-) The white choco chantilly recipe is from Cannelle et Vanille, a gorgeous baking blog, check it out.


INGREDIENTS:
4 Servings (or 3 if using larger verrines like the one in the pic)

- 2 pints of organic strawberry
- 1/2 pint (1 cup) of heavy whipping cream
- 100 gr white chocolate
- some dark chocolate shavings or cocoa powder for decoration (optional)

PREPARATION:
1. Wash, hull and cut strawberry into small pieces
2. Melt white chocolate and let it cool
3. Whip the cream until soft peaks, add a  third of the whipped cream into the bowl with the melted and cooled chocolate. Whisk vigorously. Then add the remaining cream and now, fold gently with a spatula.
4. Place the strawberry into the verrines to 2/3 full, top with the white chocolate chantilly. Use a spatula to level the top. Decorate with cocoa or chocolate shavings. Freeze or refrigerate depending on when it will be eaten.


Partager cet article
Repost0
23 mars 2009 1 23 /03 /mars /2009 03:45
I know Valentine is over, but I saw these on Coco&Medotcom and fell in love :-) And you can always make them for Mother's day!


INGREDIENTS:
makes 6 strawberry hearts

- 6 Oz. Valhrona White Chocolate
- a dozen pistachio
- 1 pint strawberry (it's good to have extra and some dark chocolate to make some chocolate covered strawberries too while you are at it)

PREPARATION
1- Melt the white chocolate  (I like to do it in a small pyrex bowl set over simmering water)
2- Spread the melted chocolate on to grease proof paper or Silpat set on a baking tray. Then pop the strawberry  and pistachio on top, spacing them apart so you can cookie-cut the hearts.  Place the tray with the chocolate spread and fruit it in the refrigerator. When the chocolate starts to stiffen, use a heart-shape cookie cutter, to cut them out!

Here is a close up:


And here are more pics to get you going :-)


Partager cet article
Repost0
22 mars 2009 7 22 /03 /mars /2009 18:09

 When is it a cup cake and when is it a muffin?  for the curious George and Georginette check out  the Faceoff: Cupcakes vs Muffins at Cakespy (just click on their cute drawing)
I love this one test: "If you threw a cupcake against the wall, you would hear something of a 'poof!' If you threw a muffin, you would hear a 'thud!'" :P

 So this morning I made these Zucchini muffins with walnut crumb topping adapting from the Zucchini Bread IV recipe from allrecipes dot com.  I definitely recommend the topping as it balances out nicely with the zucchini bottom which otherwise would be ... a bit boring methink.  And I also think these would be cute to serve on St Patty's day given the green accents in the muffins :-)


INGREDIENTS

makes 6 muffins
  • 1 eggs
  • 1/6 cup vegetable oil - 1/6 cup applesauce
  • 2/3 cups white sugar
  • 2/3 cups grated zucchini
  • 2/3 teaspoons vanilla extract
  • 1 teaspoons ground cinnamon
  • 1 teaspoon baking soda
  • 1/16 teaspoon baking powder
  • 1/3 teaspoon salt
  • 1/6 cup chopped walnuts

Walnut Crumb Topping

  • 1/6 cup brown sugar
  • 1/6 cup flour
  • 1 tablespoon butter
  • 1 tablespoon cinnamon
  • 1/4 teaspoon nutmeg
  • 1/6 cup walnut

DIRECTIONS

  1. Preheat oven to 325 degrees F ( 165 degrees C).
  2. In a large bowl, beat eggs until light and frothy. Mix in oil and sugar. Stir in zucchini and vanilla. Combine flour, cinnamon, soda, baking powder, salt and nuts; stir into the egg mixture. Divide batter into muffin pan (lined with cupcakes holder)
  3. Mix all topping ingredients  together really well and crumble on top of the batter prior to baking. Half way through baking cover loosely with foil so the topping doesn't get burned.
  4. Bake for 60 to 70 minutes, or until done.


Partager cet article
Repost0